
“What is that?”, came the cry from Karen as she walked in the door, “Ants!”. Dread overcame me as I came over and discovered that yes, we had a large number of ants crawling over our sofa. We set about trying to get rid of them, vacuuming up some, and squishing others.
When we had disposed of every ant we could find inside, we started looking outside for the source of our sudden invasion. Some searching around the corner of the main slideout revealed them to be crawling around inside the front basement door.
Hasty Removal and Beginnings of a Nest
As quickly as possible, we removed the end cap from the hanger rail and started sliding the door off the RV. In our rush, we didn’t release the driver’s side wheel arch and scraped it. But finally, the door, and its pile of ants, was released and safely away from the van.
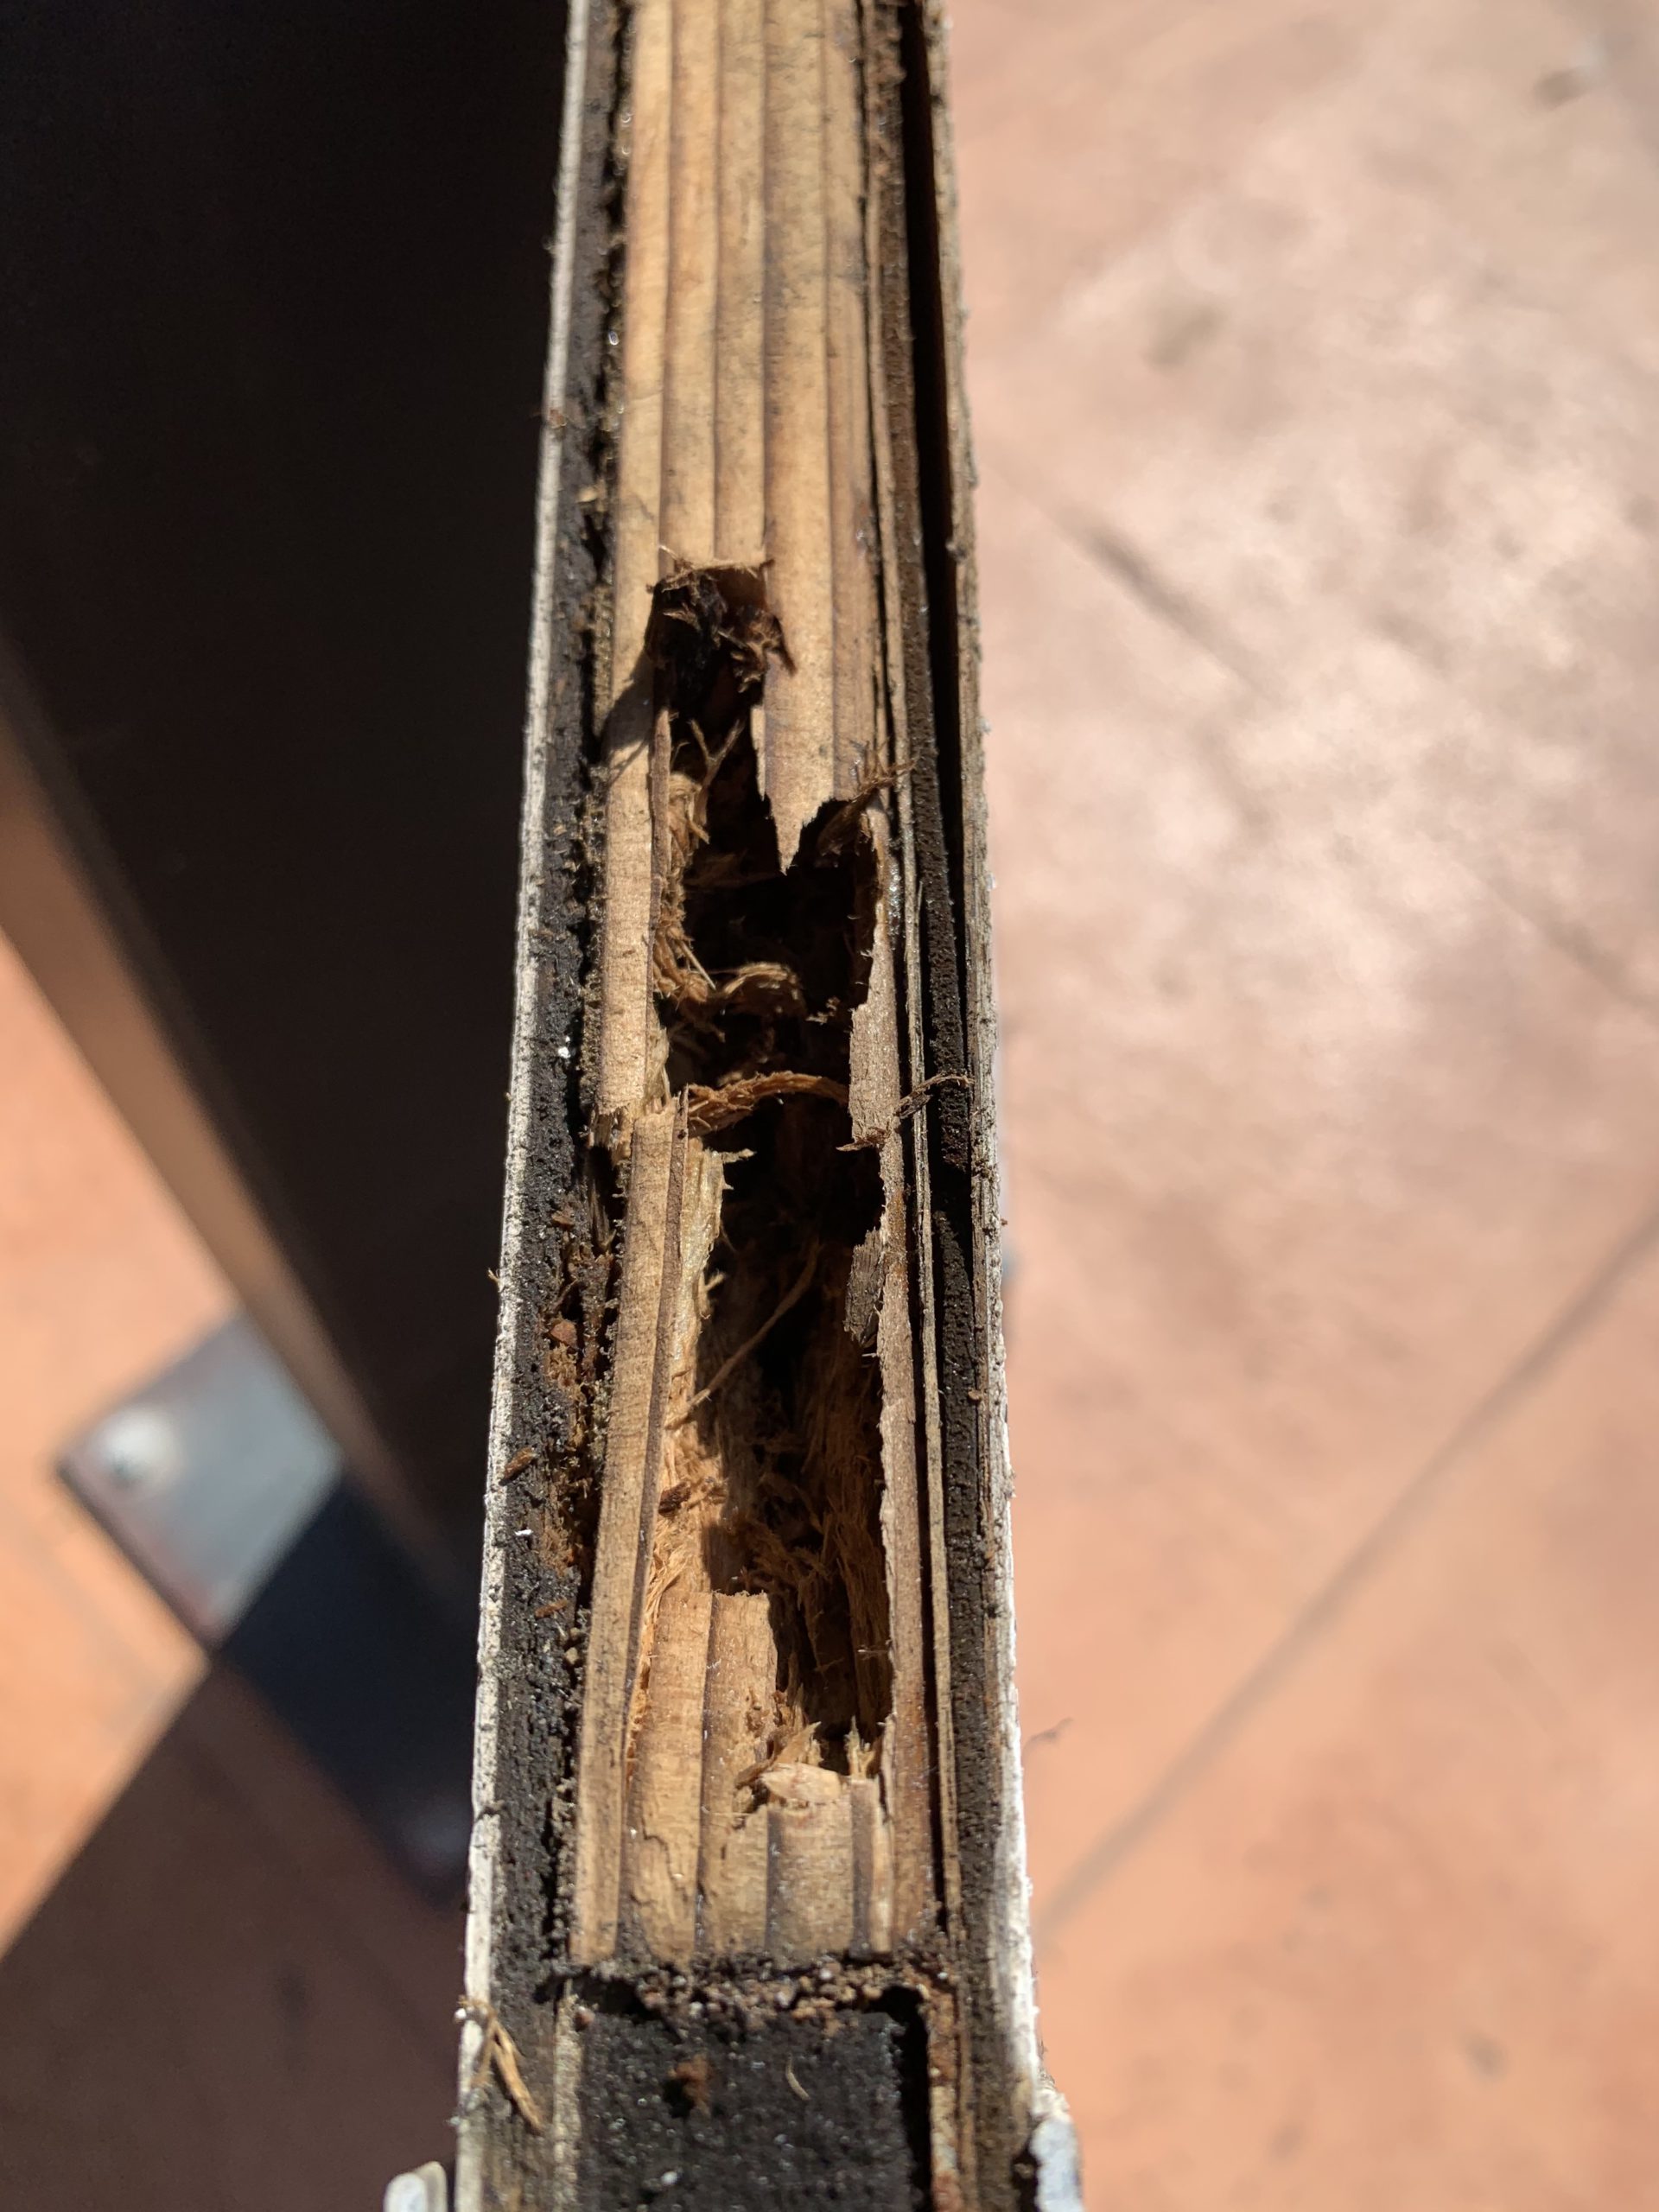
Closer investigation of the ants showed that they were getting in and out of the basement door through a gap in the metal trim. We removed the trim and found more ants, burrowing their way through what we discovered to be damp and rotting wood that lay underneath. With the ruined wood and the new ant nest, there was nothing else to do but strip the whole door apart and see what we were left with.


The Strip Down
Stripping down the door wasn’t as easy as we thought. Though the metal outer trims appear to be just bolted to the panel, they are also glued and sealed. Most of the screws came away easily enough, but a few of the bigger ones snapped. Once freed up, only leverage from screwdrivers and blades was able to pry the trim away from the door.
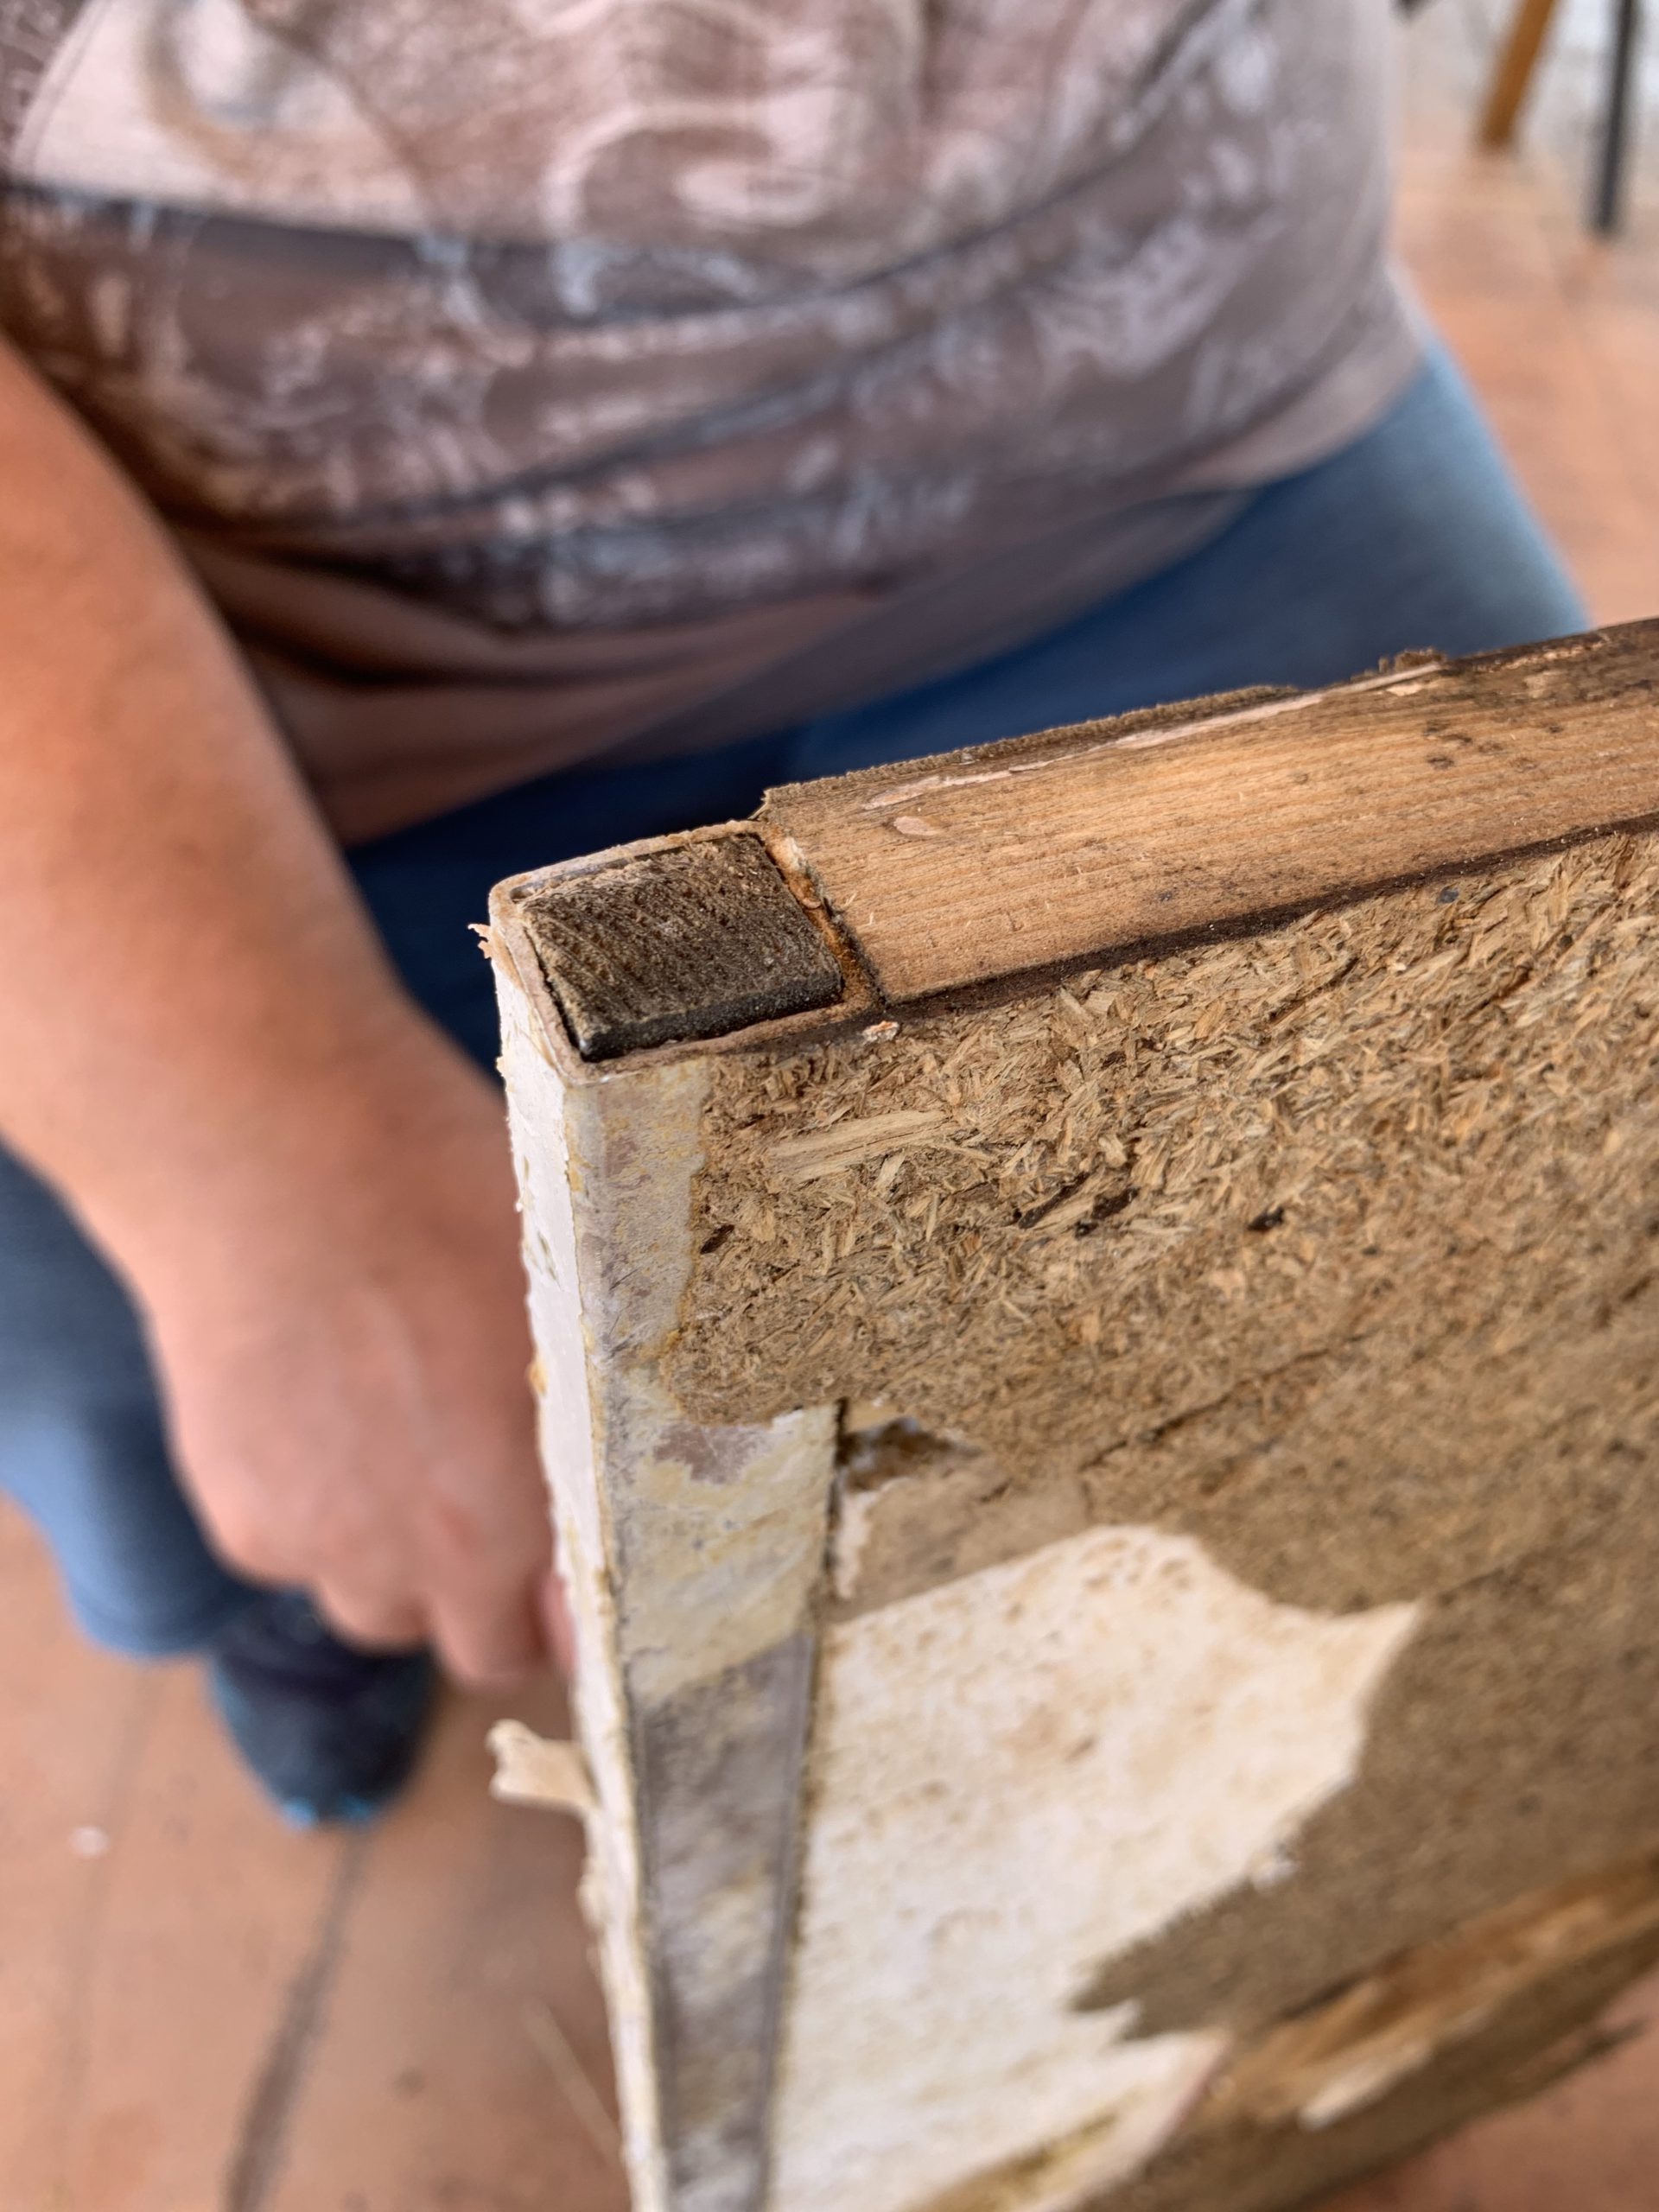
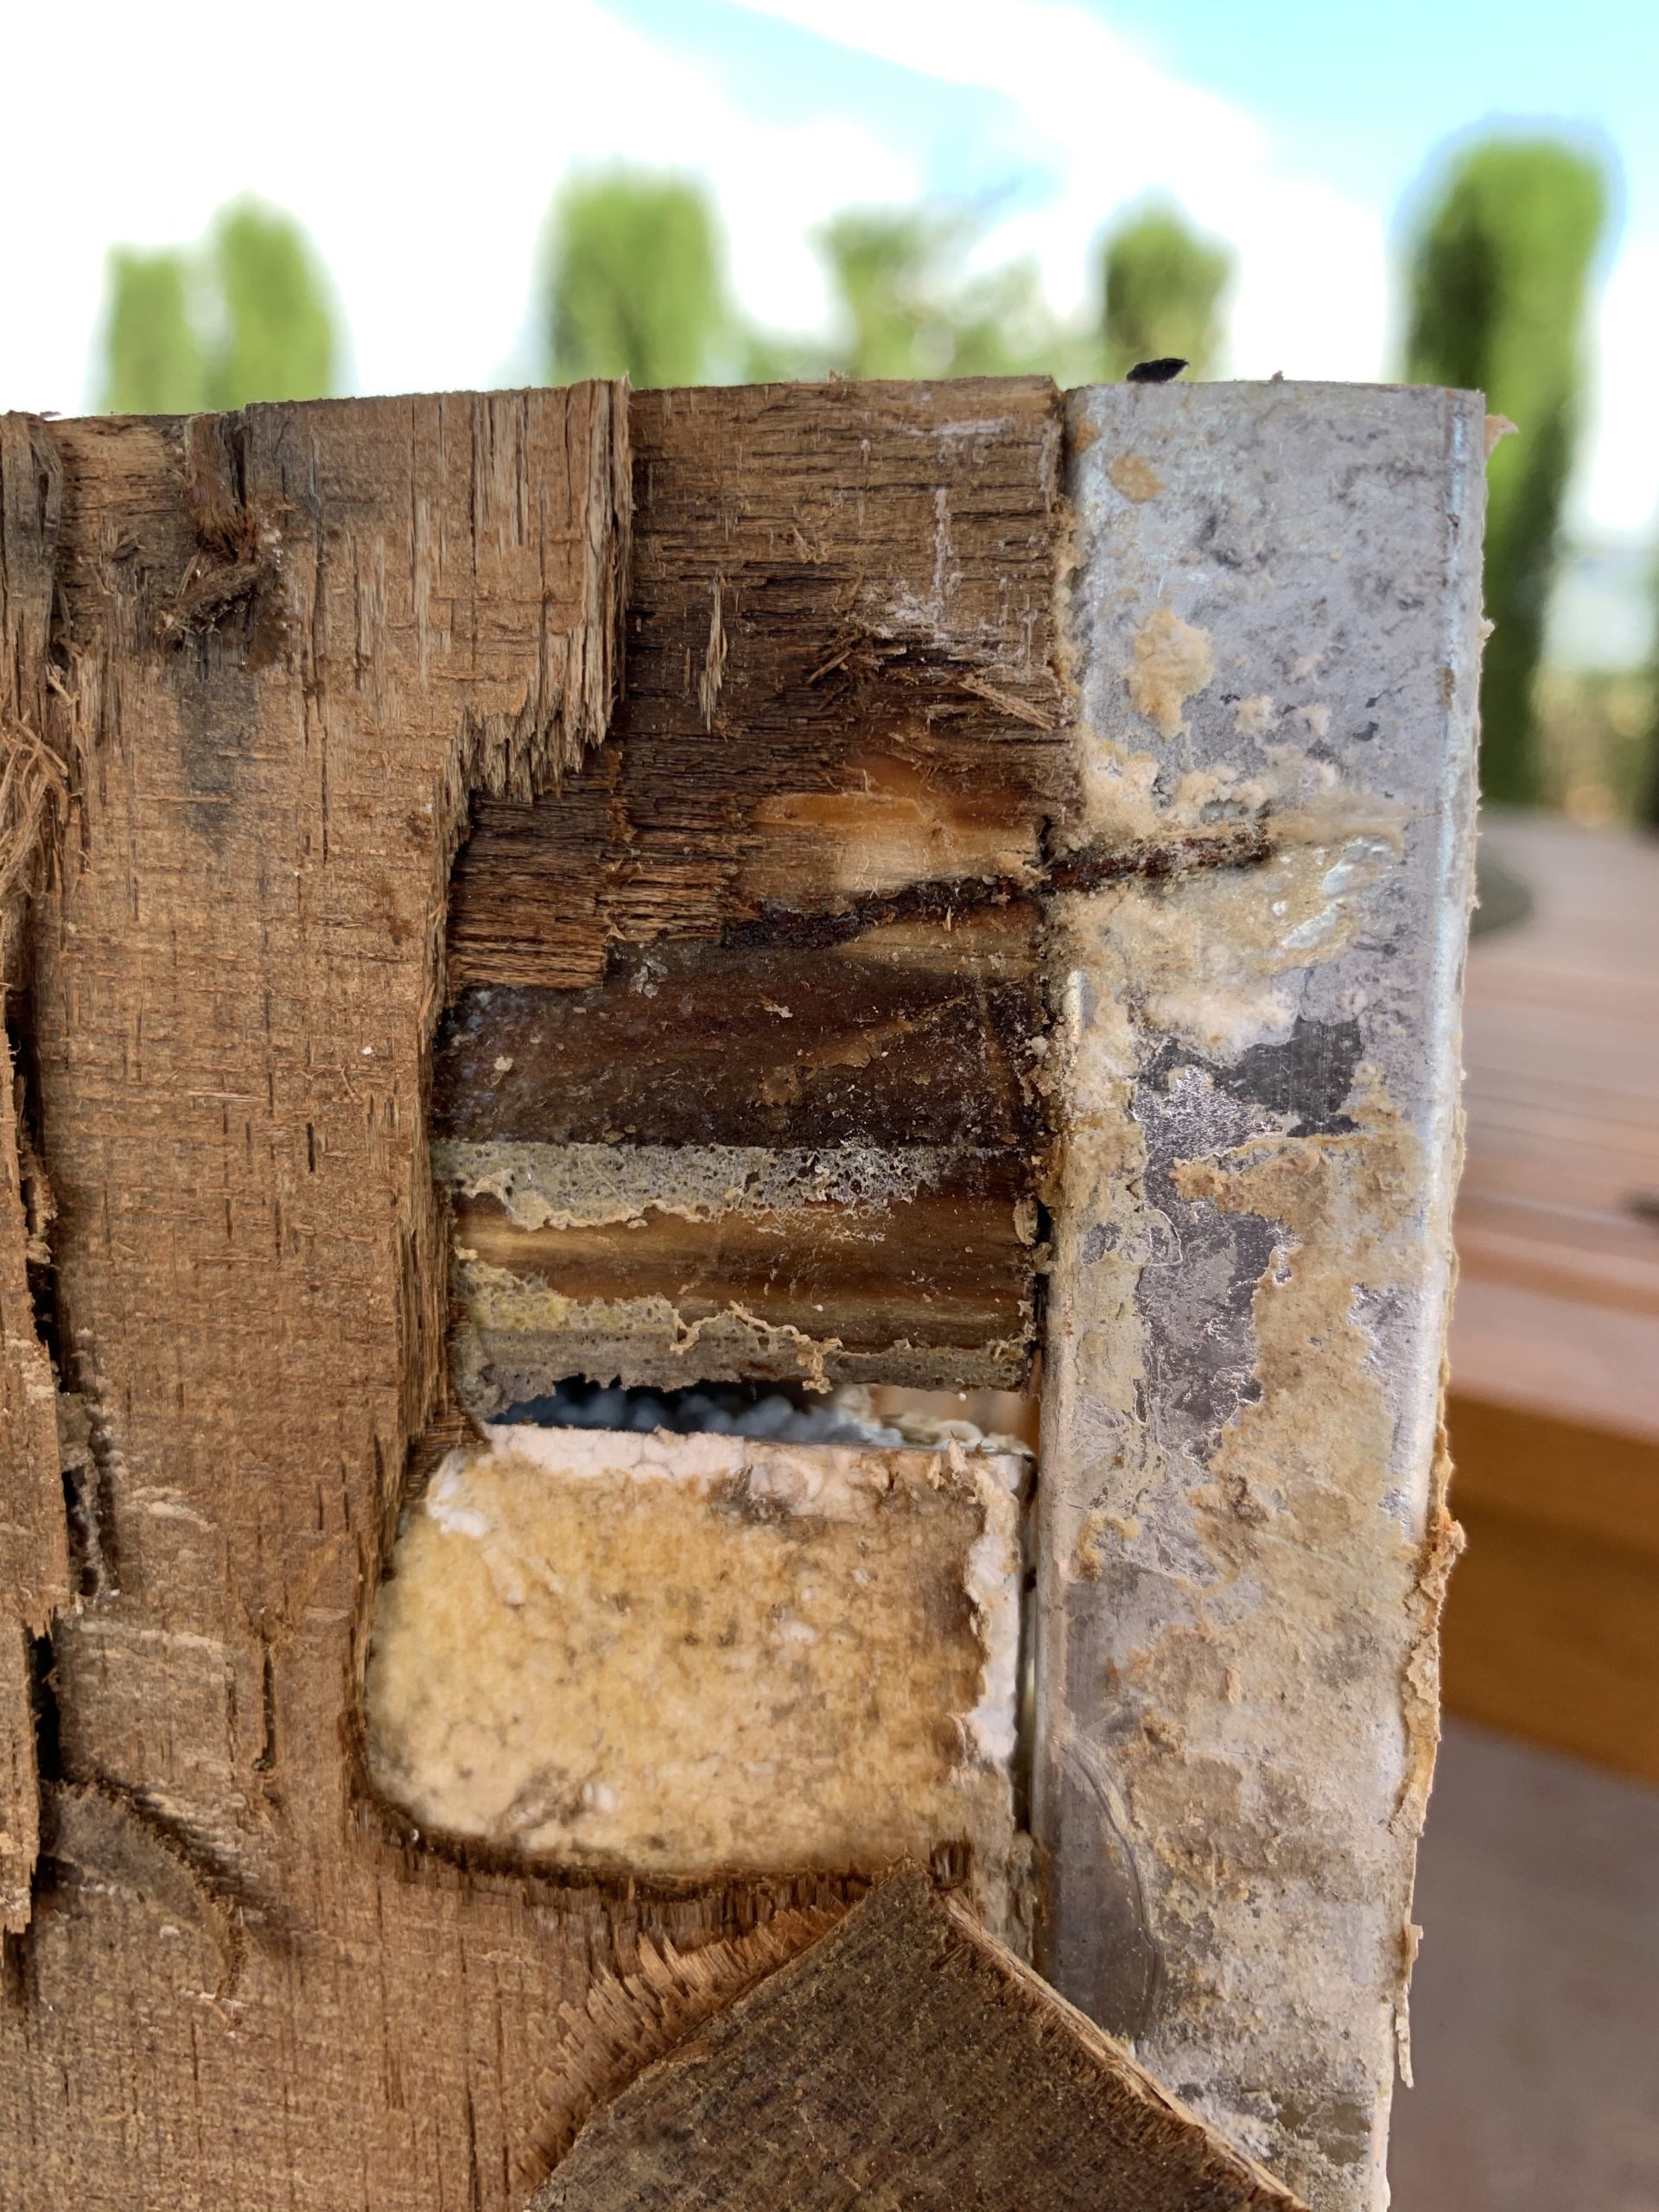
With the trims removed, we were left with the core of the locker door. The door appeared to be made of wood, with square aluminium tube along the top and bottom, then inner and outer fibreglass faces stuck to plywood and hardboard backing. The backings on both sides were damp and falling apart without the support of the outer trim, so we pushed into those, separating the outer faces from the inner core.


As we pried the door further apart, we found that the bulk of the inner door was made with polystyrene foam. Quite a dense one that presumably made the door a good chunk lighter. With the facing finally free, we surveyed the damage and the remaining door parts – this door was going to require a completely new core.


Lockdown Parts Shop
Of course, we’re only still here because of the Coronavirus pandemic, and local stores had not yet reopened. Here we were, on the east coast of Spain, with a hole in the side of the van and no parts to replace it.
Onto the internet we went. Stores were able to ship items as well as offer click and collect. But not everything was available to order online, and sizes were a problem. Our RV was made in the USA, with chunks of wood that were 2″ x 3/4″, and some that were 4″ x 3/4″, and a variety of other sizes. Here in the EU, those sizes don’t exist. The closest I could get to a 2″ x 3/4″ was 56mm x 18mm, that’s a bit too wide, and a bit too thin. Nevermind, we’re not going to do much better than that – we’ll just have to make do.
The final shopping list was:
- 56mm x 18mm x 900mm timber
- 900mm x 900mm x 10.8mm white coroplast
- 800mm x 400mm x 5mm plywood
- 1200mm x 600mm x 3mm hardwood
- 20mm x 20mm x 900mm aluminium square tube
- Metal and Timber self-tapping screws with round heads
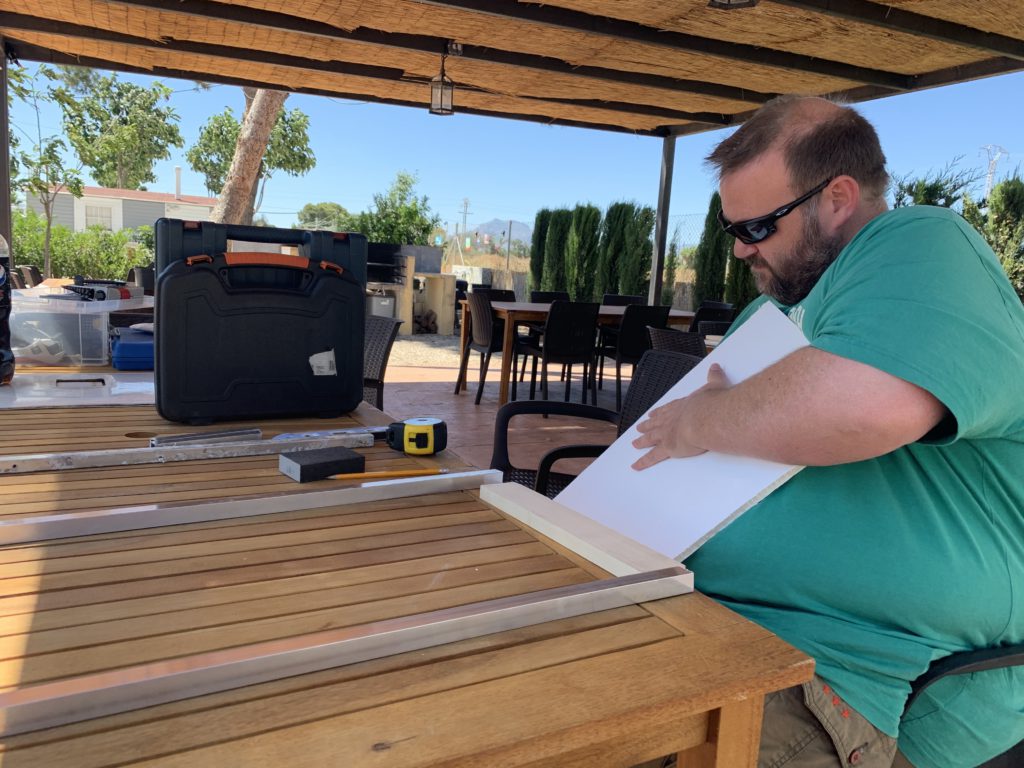
The Real Hard Work
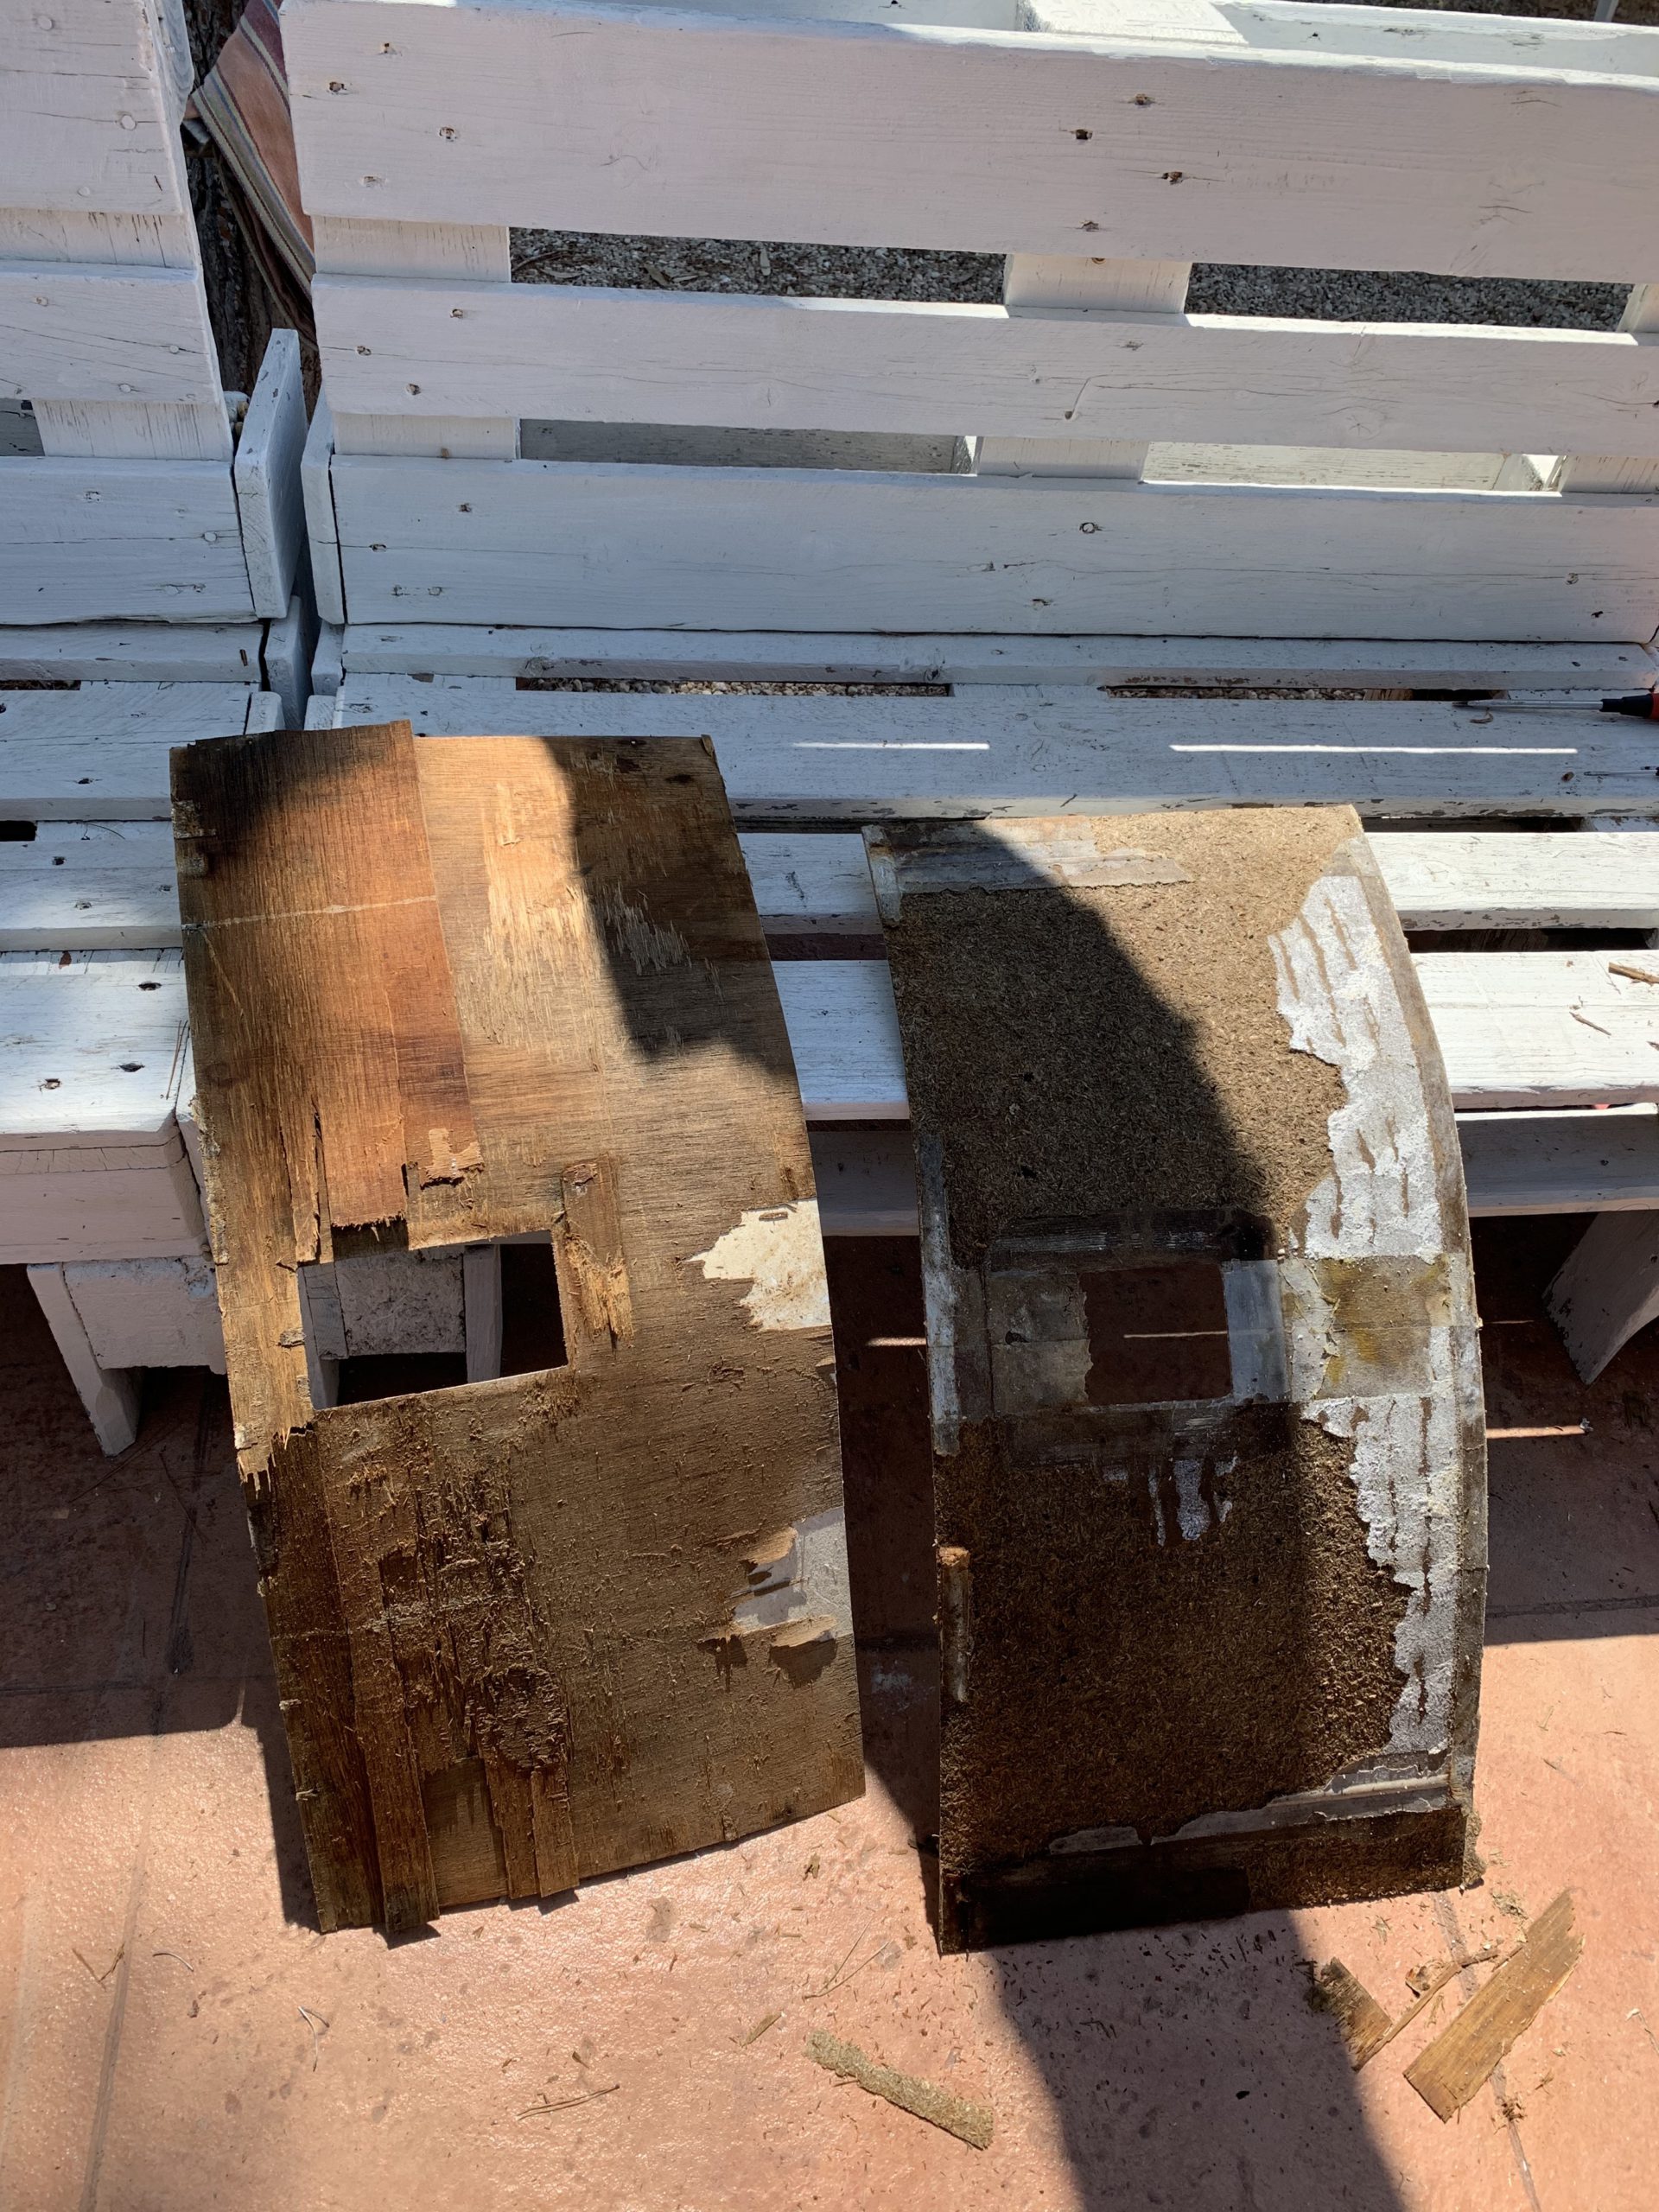
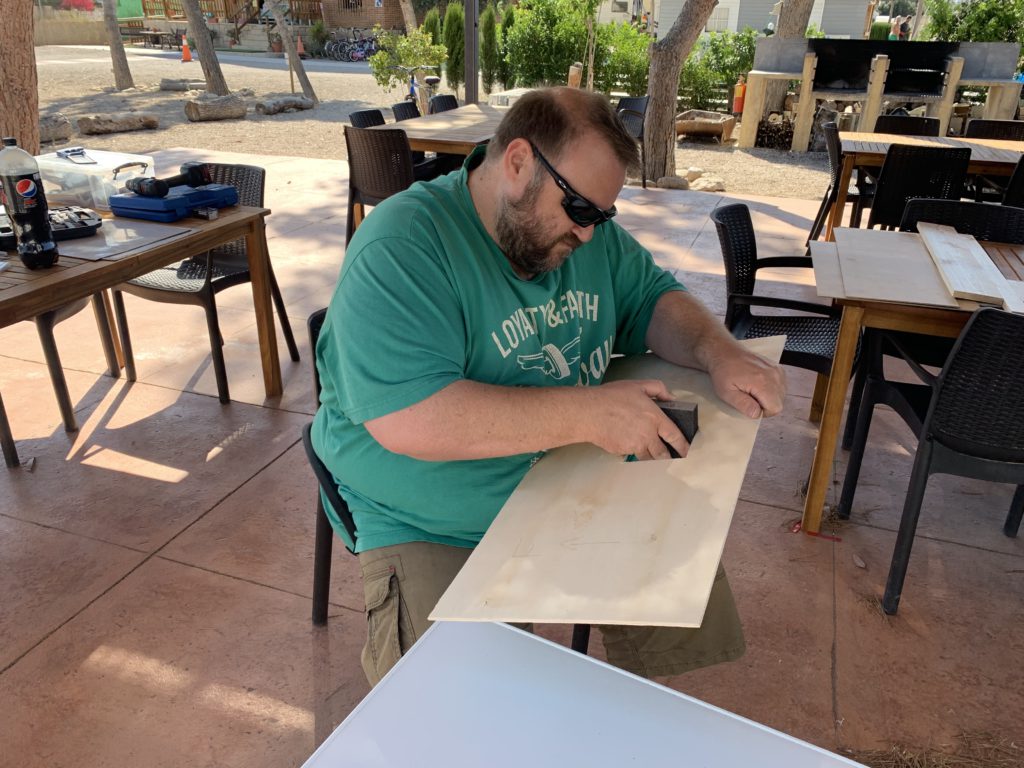
While I went to the local Aki in order to get the parts, Karen set to work on the front and rear faces. The rear face had been attached to plywood, and she used her trusty scraper to peel off the layers until just a thin, single layer remained.
The front face, on the other hand, was stuck to hardboard. This board had rotted and pulled apart in a particularly terrible state. Again, with the scraper and a knife, she tried to level out the remaining hardboard to a consistent layer. It wasn’t entirely possible, as sometimes the hardboard broke away down to the original face. In some areas, the resin from the fibreglass had seeped into the hardboard making it completely solid and almost impossible to remove.
After a couple of hours, the front face was down to a reasonable level and we sanded the remaining high spots. We left some of the resin-filled section around the lock mechanism in order to provide additional strength.
A New Core
With our array of parts, we worked out that we’d get about the same thickness as the original core by using the 18mm timber at the sides, filling the centre with the coroplast and plywood, and laying the 3mm hardboard across the entire outer face.
Once we’d worked out how the layers could go together, it was just a question of cutting everything up and putting it all together. We made plenty of markings on each piece to ensure that we knew how they should be orientated. The most difficult part was making appropriate holes in the aluminium tube to attach the wood with a nice, flush edge.


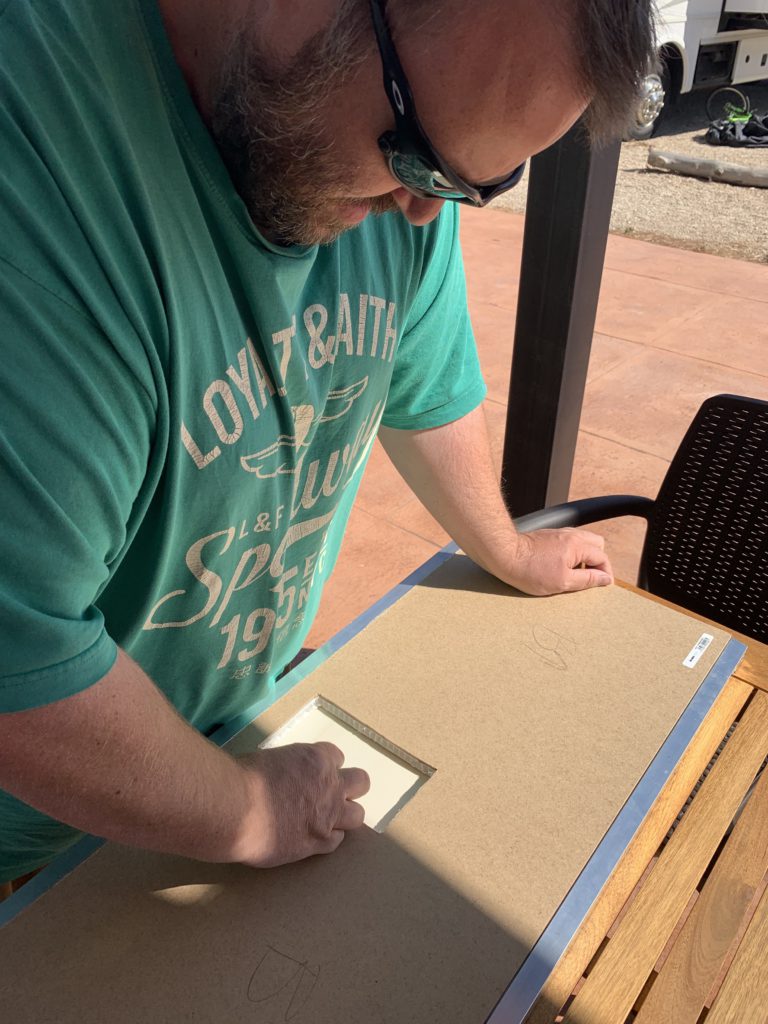


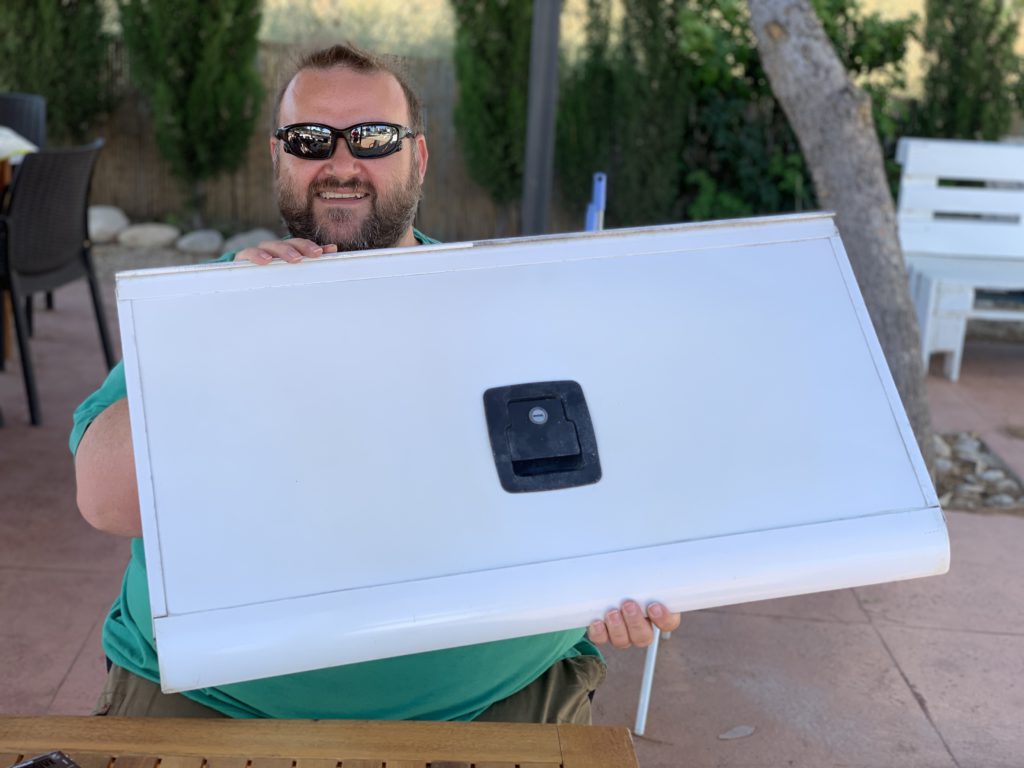
After an initial assembly without glue or sealant, we test fit the door to see if everything was going to line up. We were overjoyed when we slid the door into place, and it closed nicely. The latch went straight in and locked the door shut. You could barely tell that we’d rebuilt it all.

The Glue Factory
After the test fit, we took the door back apart so that we could glue and seal the door.
We did each face one at a time, using our one g-clamp and a couple of adjustable spanners for clamping. Boxes helped hold everything in place while the glue set.